I Built a Keyboard (Part 1)
Did You Know that I Can Solder?
It’s true. I’ve been doing it so long that I forget exactly when I picked up a soldering iron from Radio Shack but it was around the time that I owned an arcade game and needed to replace the capacitors on the monitor. This was circa 2005. I leveled up my skills by buying more and more arcade games, fixing them, and then eventually getting a job fixing arcade games.
Did You Know that I Play Guitar?
It’s true! I picked up my wife’s ignored acoustic Alvarez that was in the basement during a particularly stressful time at work and off I went. In order to let my fingers rest, I learned about the guitar effect pedal and that not only can you build pedals from kits but then buy broken ones and fix them. Fun! This required soldering. Lots and lots of soldering.
Did You Know that I Type on a Keyboard Roughly 40 a Week?
Also true! I used to use an Apple Wireless keyboard as it matched what was on the laptop. This made sense to me as was more mobile as a consultant and wanted to keep the experience as similar as possible whether or not I was at a desk.
Eventually, I moved on to the Microsoft Sculpt keyboard. It featured the same chicklet keys as the Apple keyboard but a slightly nicer form factor. I never used that keypad or mouse though. I’m sure they were great. Because this was a Microsoft product, I had to find a way to map the windows key to command and I had to use something called Karabiner-Elements to map those keys. I’d have to do this each time I get a new computer or whatever and it was super annoying.
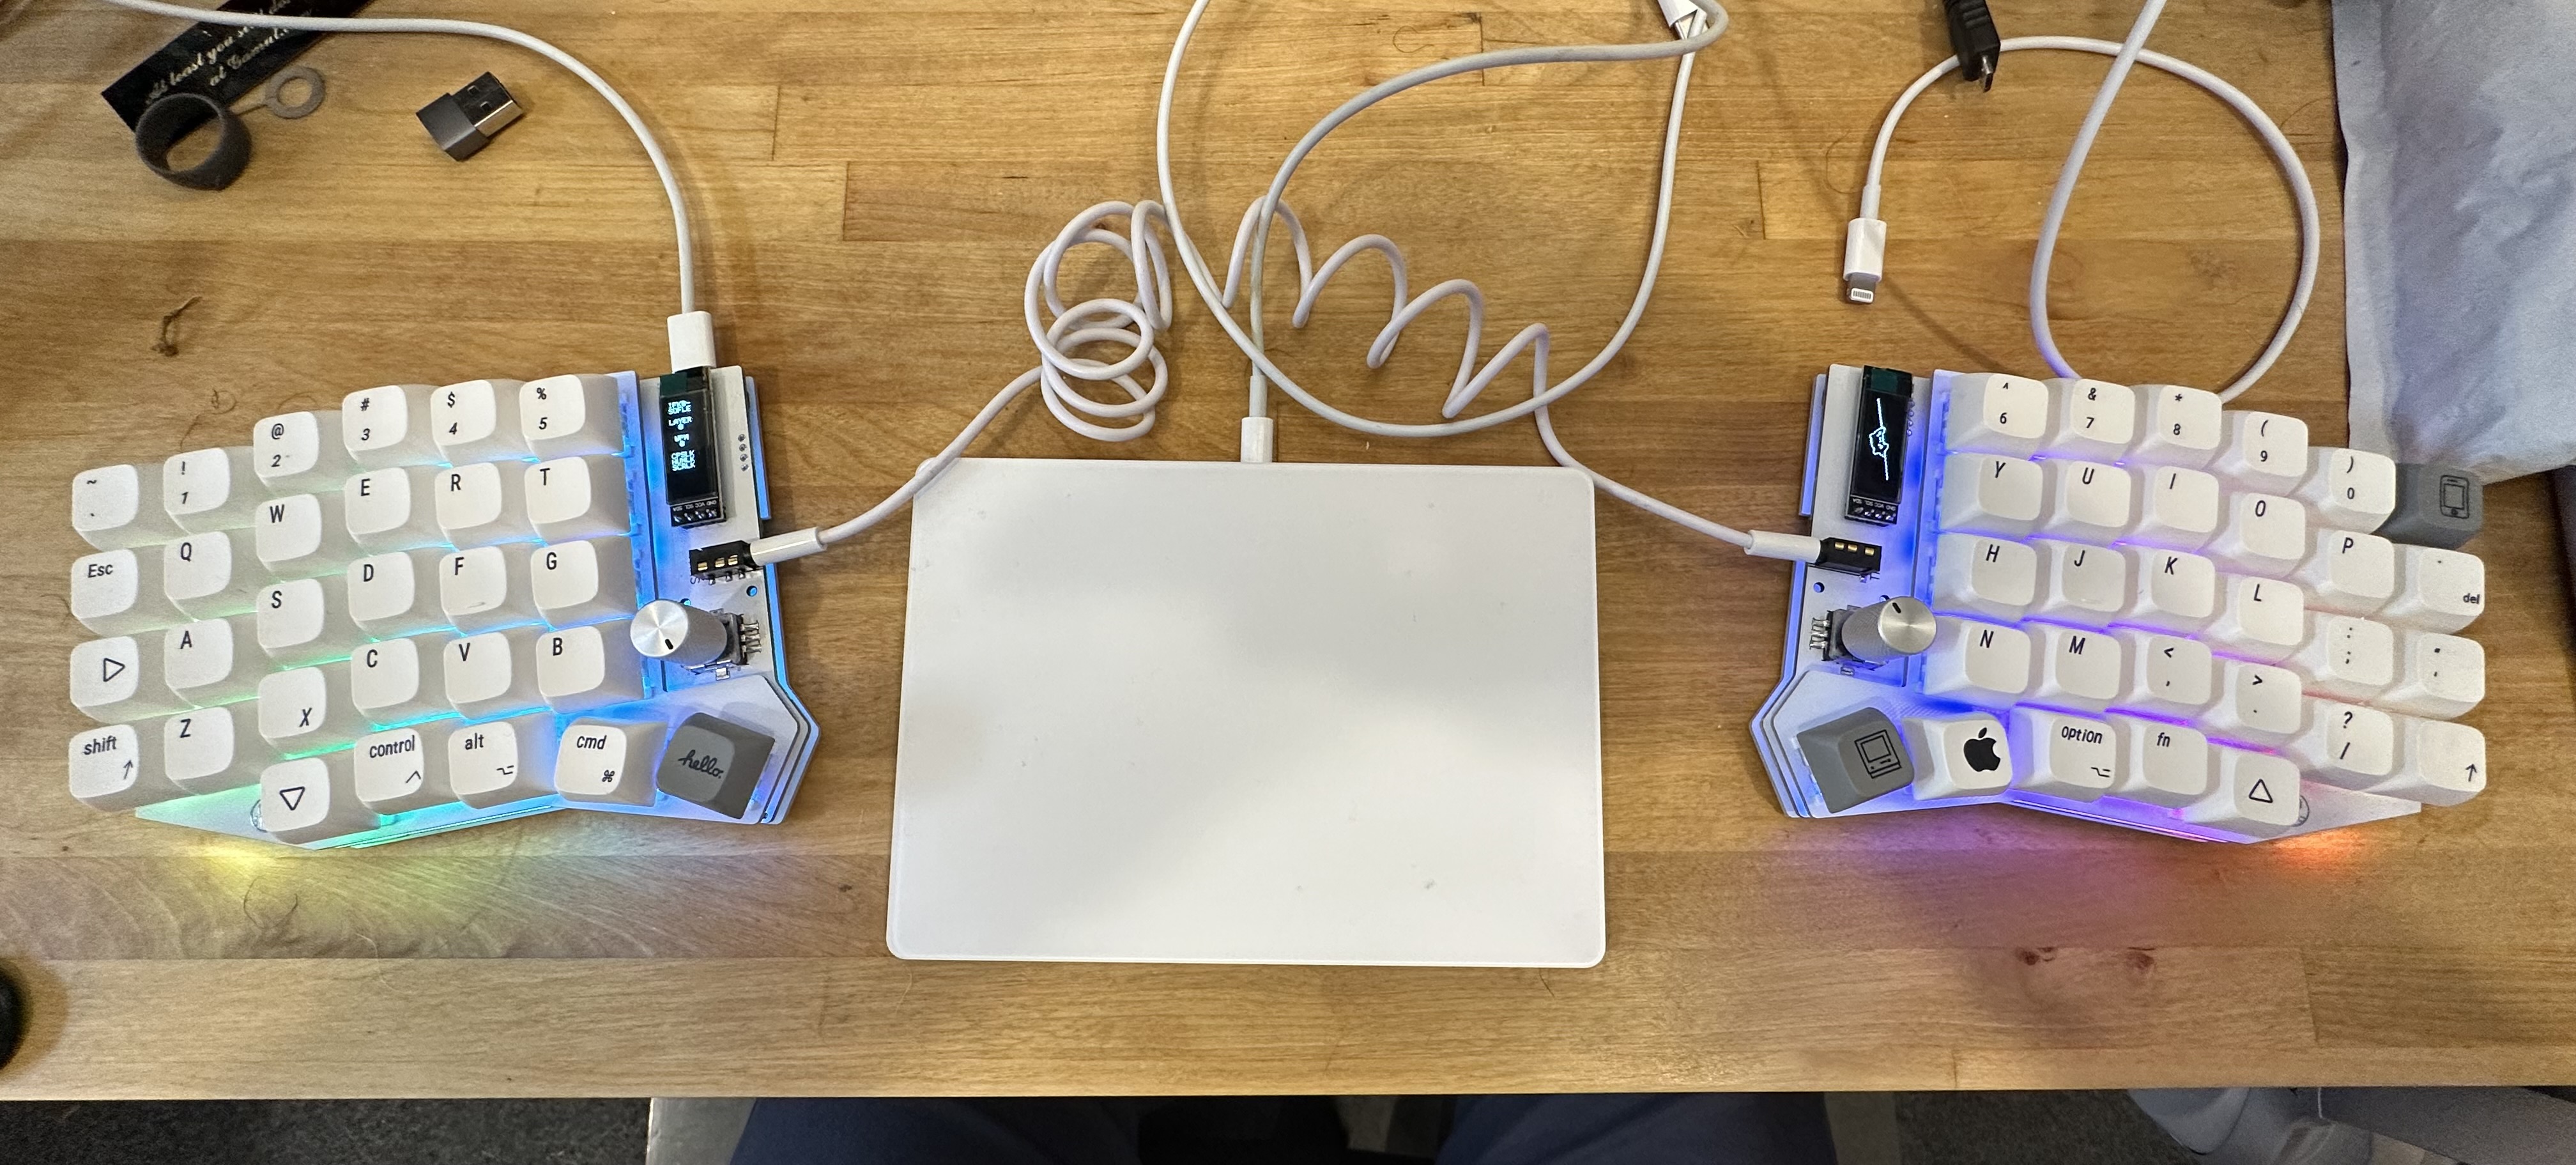
Next up is the Freestyle2 Blue for Mac by Kinesis with the super big tenting kit. This was a mechanical keyboard that actually separated and took some time to get used to. They also give these out at my current employer to employees at the office. I used this so much that I found a non-functional one at my work and robbed the keys from it as I had worn the F and J key nubs off of them through use. It’s a good keyboard and allows you to connect to multiple devices which is nice since it’s Bluetooth and that process takes forever. Also, with the keyboard actually physically split, I was able to put the Apple Magic Trackpad between the two halves which was space-efficient.
That’s Nice. Didn’t You Build a Keyboard?
We’re getting there.
You can see, though, that there is an evolution happening here. It is getting farther apart and more and more nerdy. This comes into play because somewhere around the time I used that Microsoft Sculpt, I tried the Ergodox and hated it. It seemed complex for the sake of being complex but, as is human nature, sometimes we get bored with what works well and we want to make things harder than they need to be.
Prompted by seeing a friend post a picture of what seemed like a cool looking ergonomic split mechanical keyboard (with rotary encoders!). But, of course, it’s sold out and only 2 were made, etc…
Oh, hey! Here’s one! Close enough.
Trying to Buy a DIY Keyboard These Days
These keyboards, as far as I can tell, are passion project that are open-sourced which means that you could hand-forge the PCB yourself if you wanted to but, probably, you’ll be sending it to a PCB farm in China. This also means that the Bill of Materials (BOM) is maybe documented but not in a way that you can just add to cart at Gerber and be on your way. No, you have to go to Aliexpress and find the diode (hope it’s right!) and figure out the LED (better be the right size!). Then it will take somewhere around a month to show up.
Curiously, I found one on Aliexpress that was already assembled and ready to go. How bad could it be?
Keyboard (Number One)
A month later, I found out that it wasn’t too bad! In fact, it was pretty great!
All I had to do was plug in the switches and put on the keycaps and…
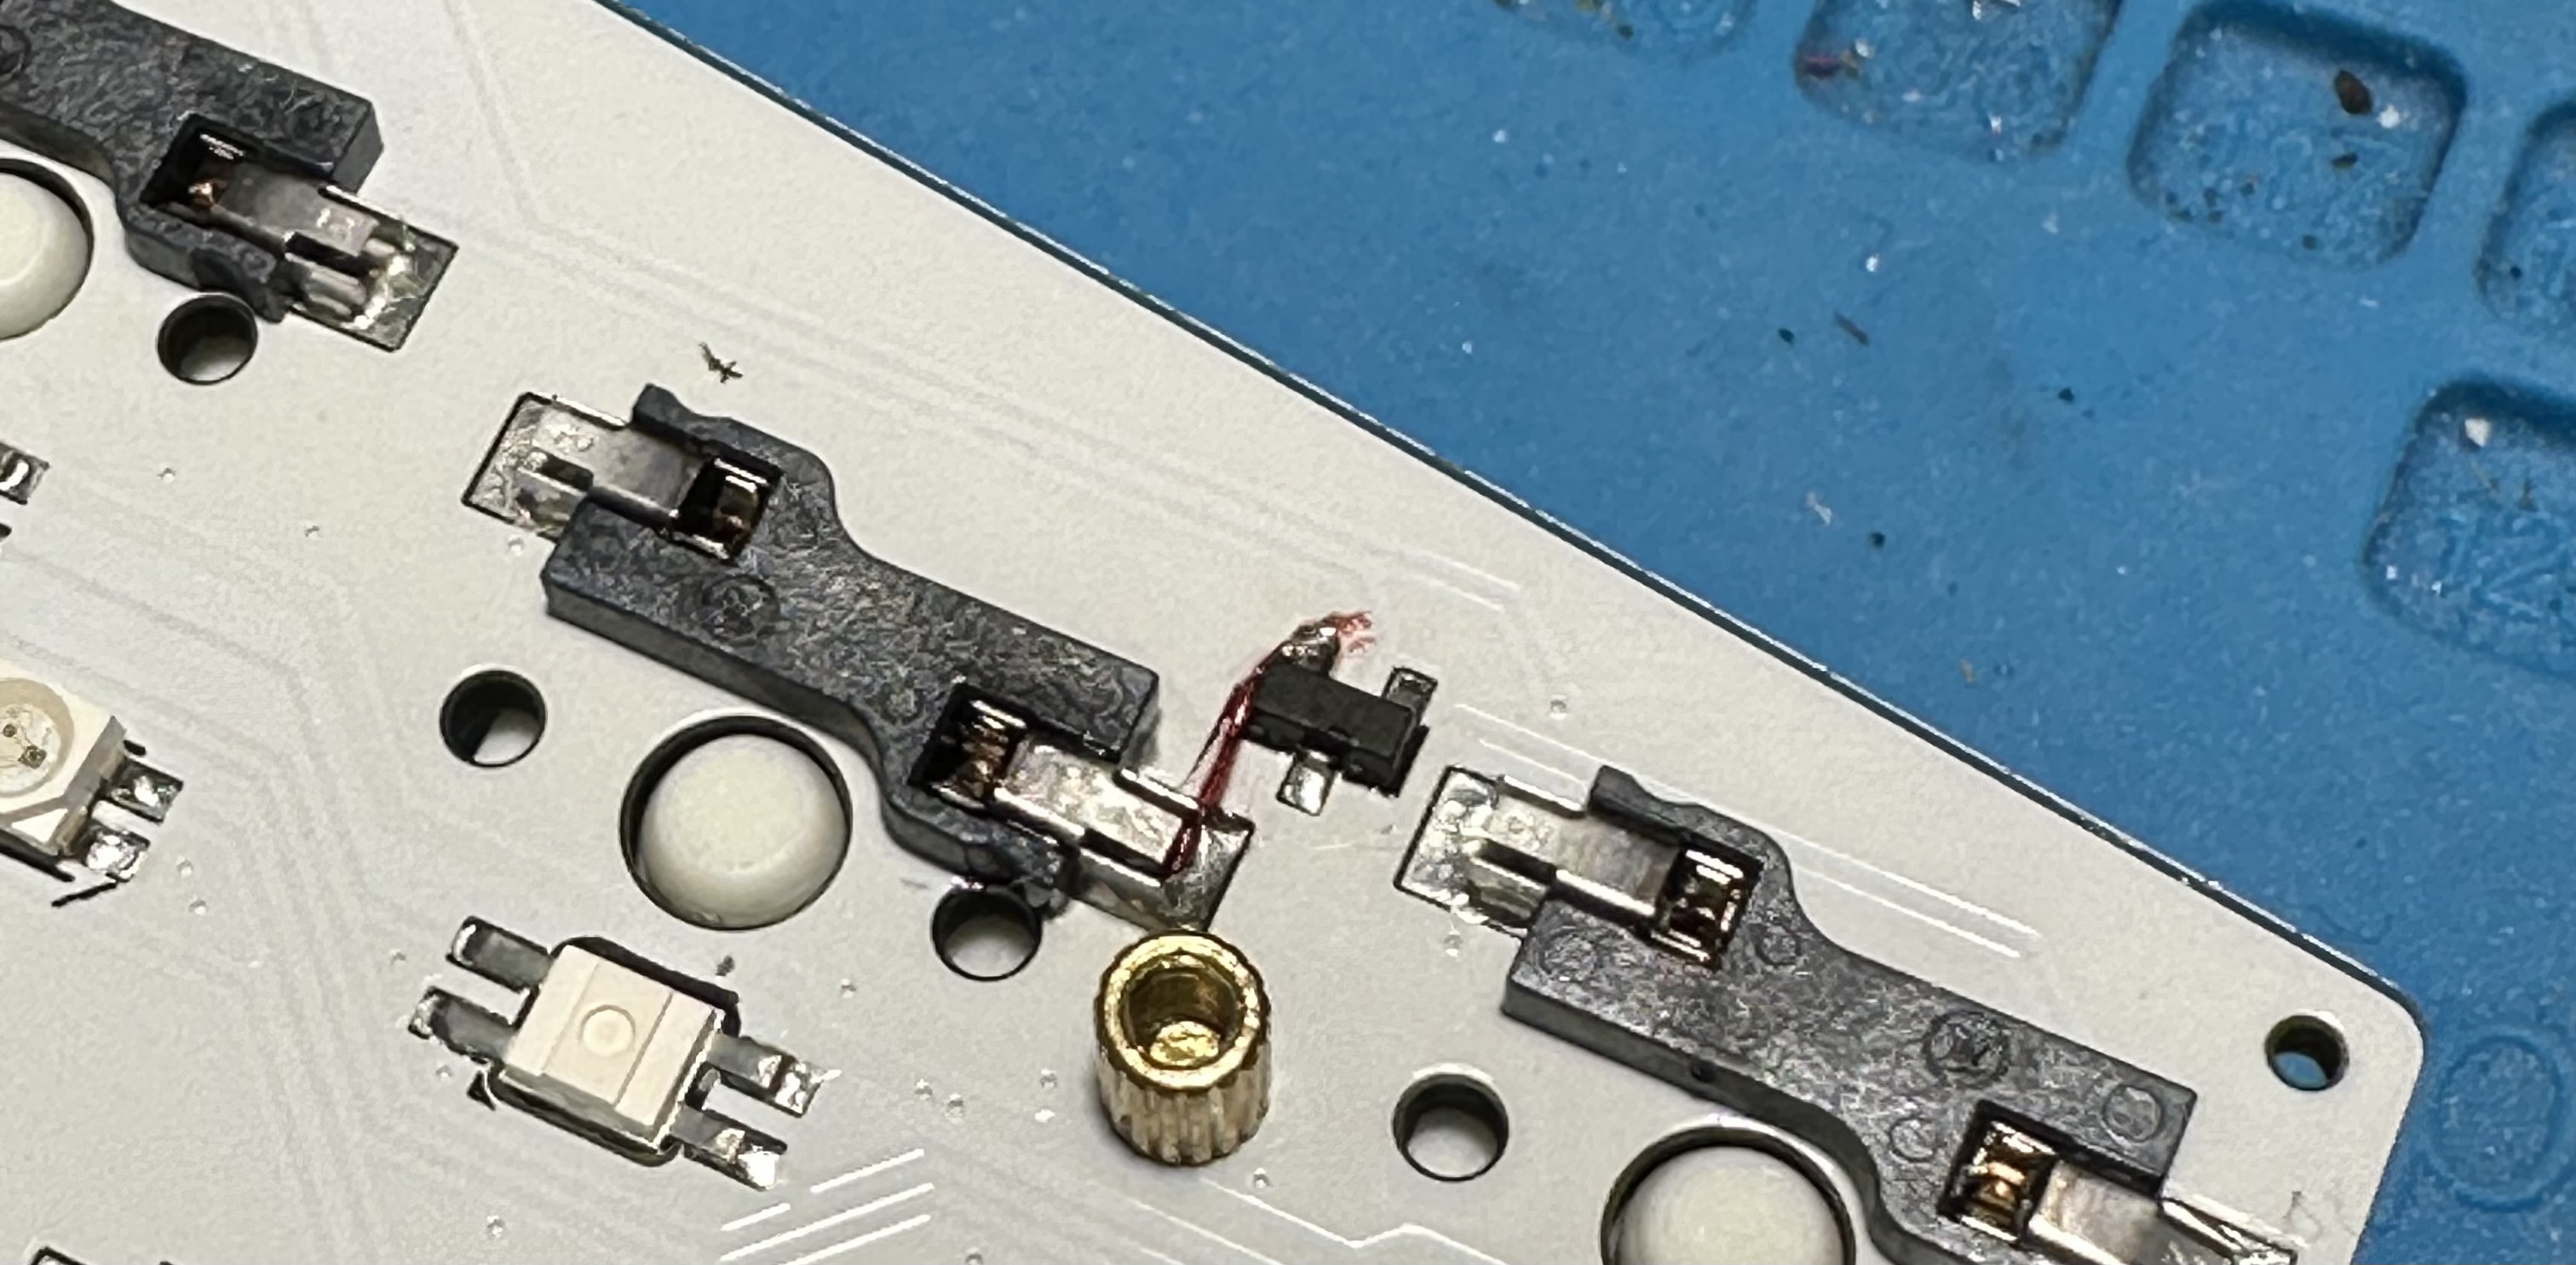
…one of the sockets ripped off the pad when the switch was inserted. Luckily, I know how to solder (see above) and was able to patch it.
In order to configure it, I had to use Vial which is an “open-source cross-platform (Windows, Linux and Mac) GUI and a QMK fork for configuring your keyboard in real time.”. We’ll talk about QMK in a bit but this program allowed me to change the keys and configure the lighting. Sounds good, let’s go.
Slowly Typing
This level of change with a keyboard is sort of like needing to learn how to type again. The B is not where you expect it so you reach for the backspace which is also not where you expect it. Then there’s the modifier keys which is kind of like the Shift key but instead of “a” turns into “A”, “n” turns into “[”. Supposedly, this let’s you keep your fingers closer to the home row. What I was interested in was those rotary encoders. Not only can you turn them but you can push them like a button. The left one could be volume up and down but then also mute. But what about that right one? I ended up using my most used Xcode shortcut for moving whole lines up and down. It’s also caps lock if you press it.
Based on the advice from others, I started slowly with 10 minutes more each day. It took about two weeks until I could code at a resonable pace. I still needed to look at the keys more than normal and I kept making mistakes but I was getting there.
With me feeling pretty confident, I did notice that when you unplugged the keyboard, it’d reset the lighting into a swirly rainbow each time I came back to it. I’d have to boot up VIAL and reset it. Since QMK is under this, I need to update QMK as maybe it was fixed. It turns out that I couldn’t. All of the documentation behind this keyboard said I needed to double-tap the reset button and I’d be able to upload new firmware. Here, instead, I got a drive mounted to my mac with some files on it that I was scared to touch. I messaged the vendor and they replied with: “Not suggest flash yourself”. I don’t know about you but I felt a little weird about a piece of hardware that I can’t update and could feasibly log my keystrokes.
This was compounded by the fact that, when I touched my microphone at my desk, I felt a static electric zap and then a column of keys stopped working. I tested all of the switches independently with no problem but, as the vendor admitted, it was probably something with the CPU on the keyboard. Unlike normal kits, though, this vendor made some changes and soldered the CPU right on the board so I couldn’t switch it out.
You Gotta Type
So, what did I do? Luckily, the vendor was gracious enough to have me send it back to China so they could fix it. But that’s nearly two months of not having the keyboard that I worked so hard to mold my fingers into a configuration. I guess it was time to actually build the keyboard like it should have been done. But where would I get the parts? How would really configuring it from scratch go? You’re just going to have to wait for Part 2.